Hey there friends, family & kindred spirits!
I am soooo excited to announce that I will be selling my handmade vintage treasures at GLITTERFEST this fall!
If you've never been to this amazing show, you MUST come and check it out! Sooo many creative souls selling their uber-incredible crafty wares. I am thrilled to be included in the lineup! In addition, there are vendors selling really cool craft supplies too.
Stay tuned for some sneak peeks of my crafty creations that will be for sale at the show!
Saturday, August 9, 2014
Wednesday, August 6, 2014
My Little Owl Ornaments
I've been so busy having fun this summer that I just haven't been able to give my blog the proper attention it deserves. Now that the grandkids are headed back to school, maybe I can remedy that!
I thought to myself, what can I share that would be simple and fun and kinda fall-ish, since the stores seem hell bent on making sure we know that Fall is right around the corner! After shedding a lil tear and saying goodbye to summer, I remembered this cute lil owl ornament that I made and sold at the craft fairs a couple of years ago. Everyone loved them and I think you will too!
I actually created this lil guy on a program called Make the Cut and saved it as an .svg file which I am including as a free download via Dropbox. Just click on the link below and download to your computer. This means that you will be able to cut the patterns on a cutting machine like the Cricut (Explore only) or the Silhouette. Just use your open or import command and select the file.
If you don't have a cutting machine, you can still make the owl old school style. Just click the link below for the .pdf file and it will take you to Dropbox. From there you can download the file and print or print directly from Dropbox. Just remember to keep it the original size, not fit to page. After it prints, cut out the template parts of the owl by hand and use them to trace the parts on whatever colored cardstock you desire.
Cut them out and follow the instructions below:
Click here for the .svg owl project file
Click to access the .pdf owl project file
Here are the supplies you will need:
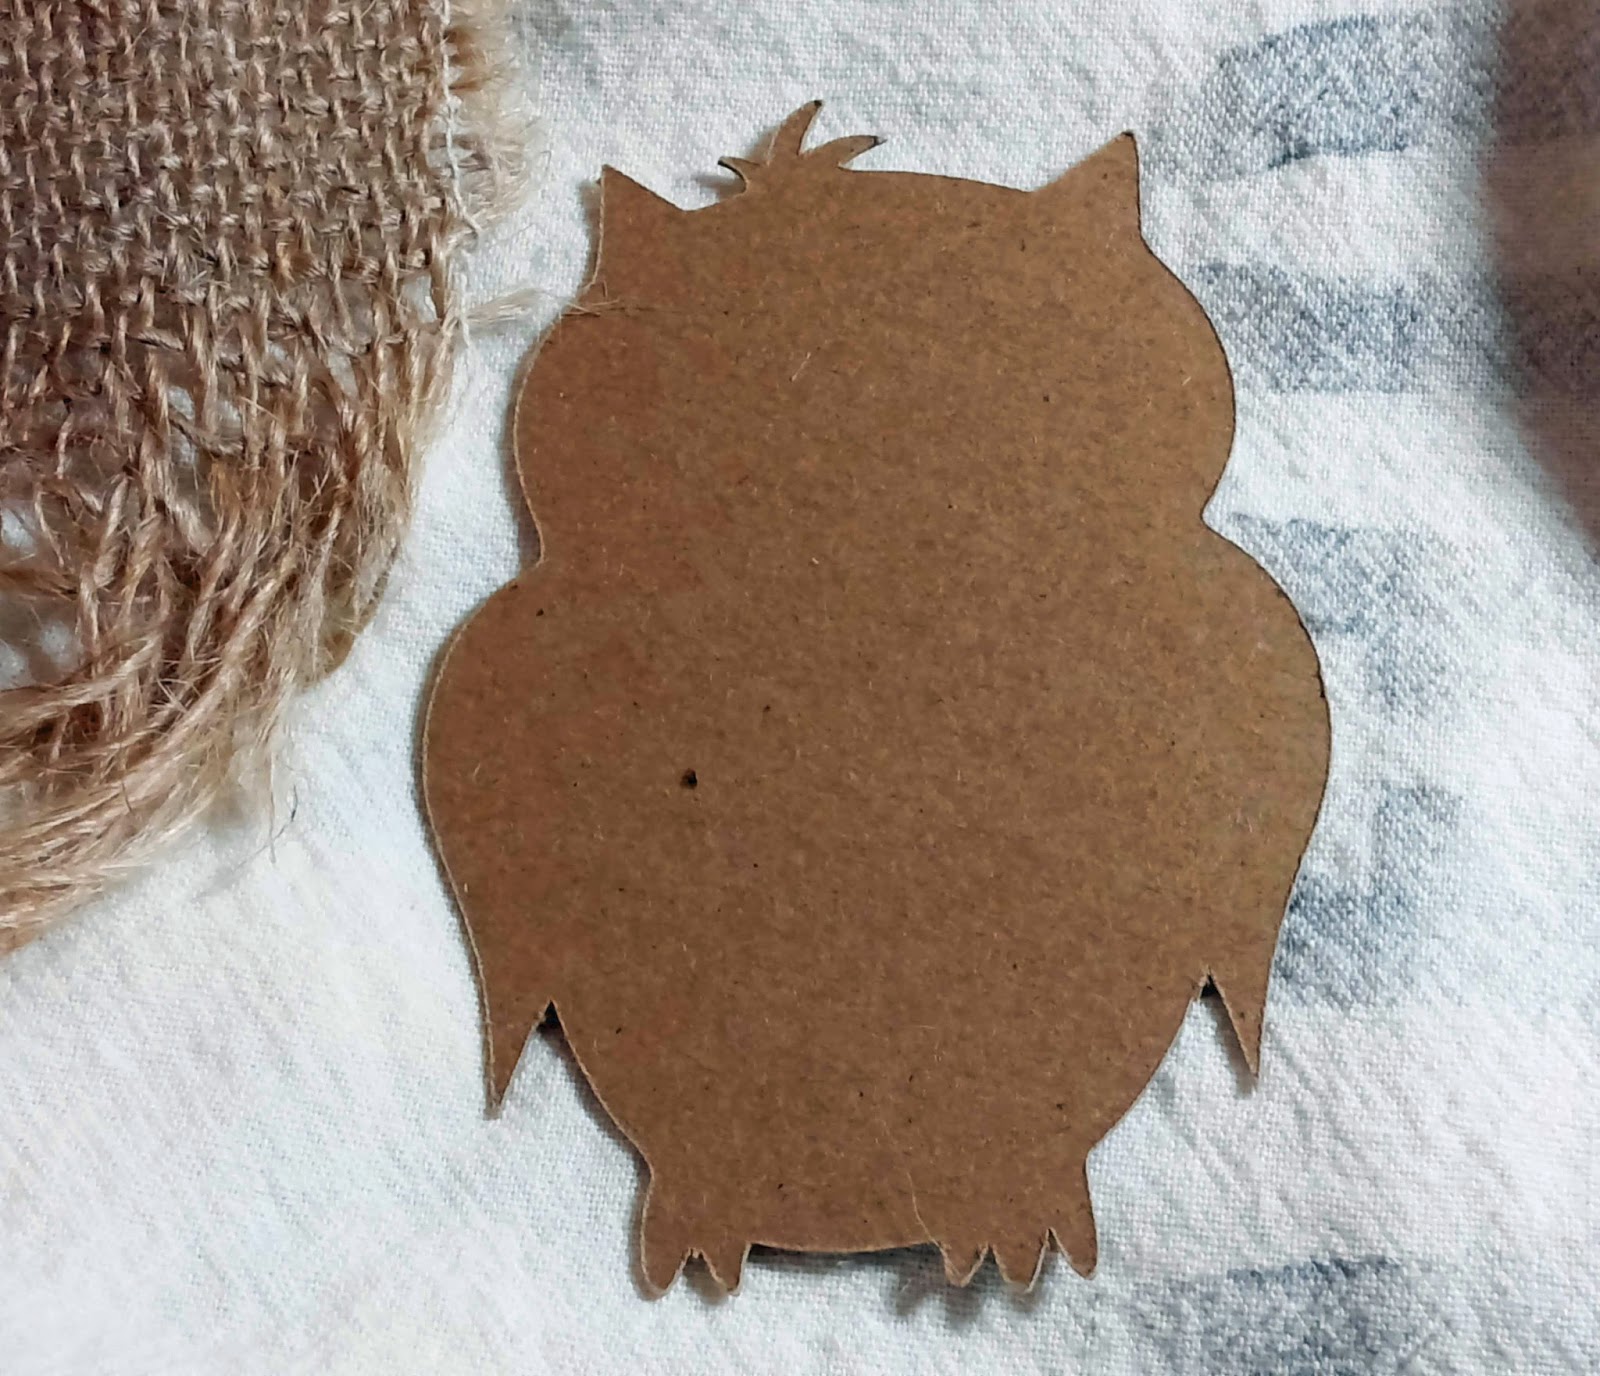
Creating this owl is fairly simple. Start out by cutting the body from chipboard. This will make it sturdy. This lil guy should measure roughly 3" wide and 4 1/4" tall overall.
Click to access the .pdf owl project file
Here are the supplies you will need:
Creating this owl is fairly simple. Start out by cutting the body from chipboard. This will make it sturdy. This lil guy should measure roughly 3" wide and 4 1/4" tall overall.
Next, cut out 2 of the same body shape from cardstock. One for the front and one for the back. But before you glue them onto the chipboard body, cut a piece of ribbon 71/2" long, make a loop and glue it to the back, about an inch down from the top of the head. This will serve as a hanger. Now, when you glue the cardstock bodies onto the chipboard, the raw ends of the ribbon will be nicely concealed. Tip: inking the edges of all the owl parts gives them even more charm! Use an ink dauber and inkpad for this.
Now you can begin adding all the parts starting with the eye base, lashes, pupils, wings and a little triangle for his beak! I like to use the Beacon 3 in 1 glue because, even though it can be a little messy, I know everything will stay on for good! It just takes a little getting used to :)
The final step is the fun part! Embellishing! I like to decorate their little bellys with fun things like lace, rhinestones, feathers, ribbon, buttons.....whatever! Just look below at the adorable photos for inspiration. I plan to decorate a few exactly alike in the same colors for a sweet little fall banner. If you decide to use any part of this design or tutorial on your blog, website or to make and sell, I only ask that you include me and my blog in the credit as the designer. Thanks!
Tuesday, May 13, 2014
I'm back!!
Hello friends!
It's been awhile hasn't it?! I know it's been a year since I've posted to my blog, but I have been soo busy. I just had too many things going on and now that I've done a little pruning, I hope to have the time to blog more. I just tried to do too many things (hello, I'm a Gemini), and all of them were fun, but didn't leave me enough time to re-fresh my creative spirit. Okay, enough of that!
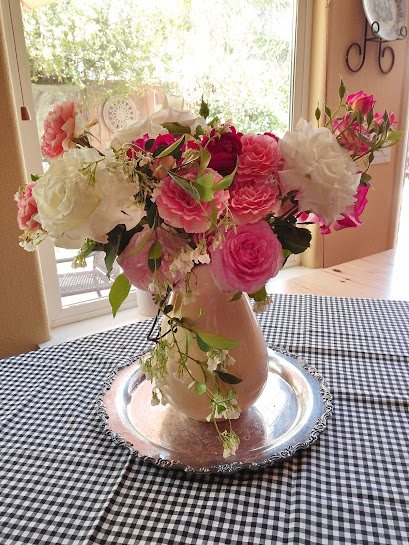
I hope you all had a lovely Mothers Day! I had a great day hanging out with my hubby, daughter, son-in-law and my precious grandchildren. The saying goes, "April showers bring May flowers" and it was so true on this Mothers Day. My daughter brought me a gorgeous star gazer lily that is still welcoming me every morning with a fragrant hello. And since my garden was ablaze with the scent of jasmine and roses galore, I picked myself this glorious bouquet! I had to take some pics to share and scrapbook. Hope you enjoy!

Every one of these beauties came from my garden!

Some tips for keeping your cut flowers looking good:
Start out using a pinch of flower food like the ones in the above photo, in your vase of water.
Cut fresh tips on each flower so it can drink up the water easily.
Remove leaves from the bottom part of the stem that will most likely be submerged in the water.
Here's probably the most important tip: change the water EVERY day! This will remove most of the bacteria that is growing in the water and keep your flowers looking happy for a long time!
,
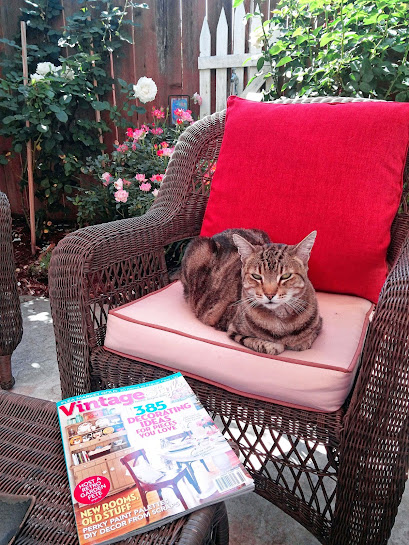
This is the life! My beautiful garden, babbling fountain in the background, a fave magazine and my big kitty Simba! I love this time of year!

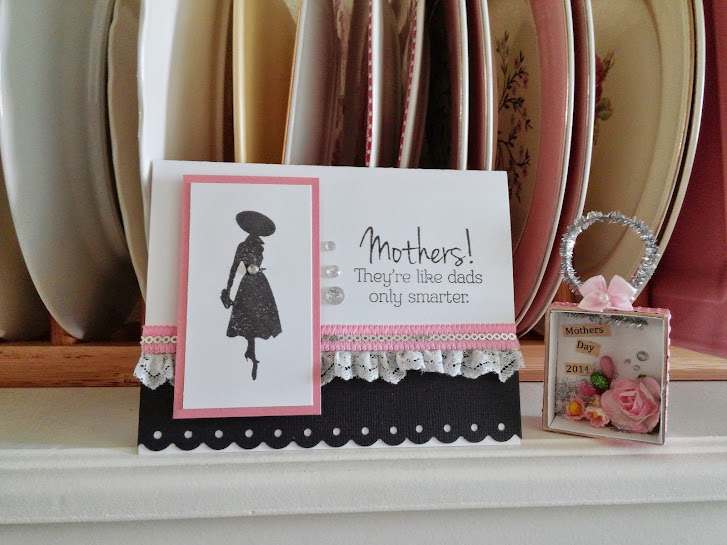
A cute card and ornament I designed for a workshop at home using Close to My Heart stamps. I'm a consultant for CTMH.

Isn't this the sweetest little ornament?! I found the plain little chipboard boxes for 25cents each at Junque Trunk, a really cool flea market in Tustin, CA. Junque Trunk is sponsored by Whimzy, an equally awesome brick and mortar store that sells incredible vintage goodies!
Thanks for stopping by!
It's been awhile hasn't it?! I know it's been a year since I've posted to my blog, but I have been soo busy. I just had too many things going on and now that I've done a little pruning, I hope to have the time to blog more. I just tried to do too many things (hello, I'm a Gemini), and all of them were fun, but didn't leave me enough time to re-fresh my creative spirit. Okay, enough of that!
I hope you all had a lovely Mothers Day! I had a great day hanging out with my hubby, daughter, son-in-law and my precious grandchildren. The saying goes, "April showers bring May flowers" and it was so true on this Mothers Day. My daughter brought me a gorgeous star gazer lily that is still welcoming me every morning with a fragrant hello. And since my garden was ablaze with the scent of jasmine and roses galore, I picked myself this glorious bouquet! I had to take some pics to share and scrapbook. Hope you enjoy!

Every one of these beauties came from my garden!

Some tips for keeping your cut flowers looking good:
Start out using a pinch of flower food like the ones in the above photo, in your vase of water.
Cut fresh tips on each flower so it can drink up the water easily.
Remove leaves from the bottom part of the stem that will most likely be submerged in the water.
Here's probably the most important tip: change the water EVERY day! This will remove most of the bacteria that is growing in the water and keep your flowers looking happy for a long time!
,This is the life! My beautiful garden, babbling fountain in the background, a fave magazine and my big kitty Simba! I love this time of year!
A cute card and ornament I designed for a workshop at home using Close to My Heart stamps. I'm a consultant for CTMH.

Isn't this the sweetest little ornament?! I found the plain little chipboard boxes for 25cents each at Junque Trunk, a really cool flea market in Tustin, CA. Junque Trunk is sponsored by Whimzy, an equally awesome brick and mortar store that sells incredible vintage goodies!
Thanks for stopping by!
Tuesday, April 30, 2013
Paint Chips.....who knew?
Well, I am one busy lady these days. I have my blog and my little crafty business "A Vintage Mouse". I teach scrapbooking at the local big box craft store (not allowed to say which one but if the letter "M" pops into your mind, go with it :))) I also sell Close to my Heart (sandyholly.ctmh.com). I love their products but enjoy creating my own designs with them. Recently, as I was noodling around ideas for a CTMH card workshop I was going to host, the hubby reminded me we needed to pick out paint for a sweet little table I picked up for a song. Now, I would rather eat a bug than follow my hubby around in a hardware store, but since the paint was for me, I was stuck. Let me tell you, there are a bzillion shades of white (for the table) and picking the right one was nearly impossible, because I couldn't take my eyes off all the gorgeous colors in front of me!! With irresistible names like French Riviera (teal) and Two to Tango (orange) I was completely smitten! Wait a minute, I thought, this is just what I need to give my cards a real punch! With a can of Antique White in the cart and my purse stuffed with paint chip lusciousness, we headed home. After completing my card designs, I set about creating kits for them. This makes it so much easier for the customers to deal with.
So
proud of myself! I actually set up the paint chips to cut on the Cricut
for this card! Very helpful since I was planning to make 7 kits for the
workshop. I used Make the Cut to set this up, but Cricut Craft Room would
work too.
I was
a bit worried how they would cut with the Cricut, but the paint didn't chip and
since they're about the same thickness as cardstock, they cut just fine. And
they stuck to the mat really well!
Here
they are! Whatcha think? I can't wait to try them on other
projects! But I think I better wait a bit before I raid the paint
aisle again ;) I think they need to re-stock :))
(Four cards have the paint
chips)
P.S.
Be sure to visit my Close to my Heart web page. You'll
see some awesome stuff! Plus, you can order right off my page!
http://sandyholly.ctmh.com/
Thursday, April 11, 2013
More than just a Purse!
I came across a stash of vintage black purses while doing a little pikin' awhile back. You know the kind....some 60's patent leather, gold accents, Lucite handles, dressy fabric.....something your grandma might have owned. After some thinking, I decided they were too cool to just use as a purse and maybe a bit too shabby too (and not in a good way :)). So I decided to play around with something I had seen on Pinterest awhile back......using them to display vintage photos! Just a really cool piece of wall art that would be gorgeous with a shabby chic, Paris apartment or French country kind of décor. Very glammy. But guess what, I actually did what I always forget to do when I'm in a creative frenzy........I made a tutorial for it! Now mine turned out a little different than the ones I saw on Pinterest, but pretty cool just the same!
![]() |
| Cut some floral foam to fit inside the purse. |
Tuesday, March 26, 2013
First Rose of Spring
Spring is my very, very favorite time of year. I love watching the tiny little buds slowly poke their little heads from the bare wood of the trees in my yard. I love the soft colors too. Spring green, pale pink, robins egg blue, purple iris, daffodil yellow. Spring means we made it through winter and all is new again. This year there's a new pope in the Vatican. So fitting then, that the first rose to bloom in my garden is Pope John Paul II, a white beauty with a strong, lovely fragrance. It's the perfect bloom to jump start my favorite time of year!
Tuesday, March 19, 2013
Easter Craft Time!
The year is still fresh and I've been crafting my little heart out! I've been making lots of new things, it seems there is no shortage of ideas and inspiration that fill my little mouse head, keeping me up at night, full of excitement. One of those ideas is a cute little Easter craft that I'd like to share with you. I've always been into recycling and when a friend was blessed with a precious little grandson, I asked if I could have any empty baby food jars she had. I turned these little jars into a fun Easter gift that will add a bit of whimsy to any Easter basket! Let me show you how....
![]() |
| Start with an empty baby food jar. My husband likes the peaches and apricots, so even if I didn't have access to baby food jars, he said he would be willing to help me out with the project! :)) |
Subscribe to:
Posts (Atom)